


Buying Guide
How to Buy a Nail Repair Kit
This short guide helps you pick the right nail repair kit for quick at-home fixes or pro-style touch ups. It covers what matters most, the types you will see, shopping tips, common mistakes to avoid, and fast expert recommendations so you can take action today.
What to look for - key factors and important specs
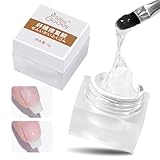
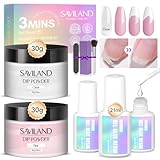
Choose a kit that includes the essentials for a complete repair: a brush-on gel or resin, a filler powder or dip powder, and basic tools like a buffer and file.
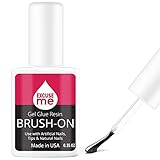
- Contents - Brush-on gel/resin plus filler powder gives the strongest, seamless repair; single glue-only kits are faster but less durable.
- Drying and curing - Look for air-dry systems if you want a salon-free solution; some air-dry kits claim cure times around 3 minutes.
- Durability - Expect repairs to last up to a few weeks with proper application; some products advertise 21+ days under correct use.
- Safety and odor - Prefer kits labeled non-toxic, non-yellowing, and free of common harsh chemicals like formaldehyde, DBP, or toluene; odor-free systems are easier to use at home.
- Size and value - Typical resin bottles range from 0.5 oz to 21 ml and powders from a few grams; price commonly falls in the low to mid teens USD for basic kits.
- Color options - Choose clear for invisible fixes or natural pink if you want a polished look after repair.

Types of nail repair kits and when to use each
- Brush-on gel plus filler powder - Best balance of strength and appearance; fills gaps and bonds with a smooth finish. Good for cracked or split natural nails.
- Glue-only kits - Fast emergency fixes for broken tips; simple and fast but less long-lasting.
- Dip powder systems - Durable and chip-resistant; often described as more durable than acrylic for repaired areas and usually odor-free.
- Professional-strength kits - Heavier-duty resins and powders intended for salon use; choose these if you have experience or plan longer wear.
Where to buy and common shopping mistakes to avoid
Online marketplaces give the widest selection, customer photos, and user reviews; use them to confirm kit contents and see real results. Retail stores offer instant purchase and easier returns if you need a last-minute fix.
- Check photos and the product description to confirm the kit actually includes a brush, resin, filler powder, and at least one tool.
- Read recent reviews and Q and A for notes on drying times and real durability.
- Buy from sellers with good return policies and clear ingredient lists if you have allergies.
- Applying thick coats of resin - thick layers take longer to dry and are more likely to chip.
- Skipping nail prep - failing to clean and lightly buff the nail reduces adhesion.
- Getting glue on the cuticle - this prevents a flush bond and can irritate skin.
- Buying purely on price - very cheap kits may lack essential tools or have weak resin.

Quick expert checklist and action tips
- Buy a kit that includes brush-on resin, filler/dip powder, a buffer, and a file.
- For home use pick an air-dry system that advertises quick cure times and low odor.
- Prep first: clean, trim, and lightly buff around the break before applying product.
- Apply thin layers of resin, dip or dust with powder, then buff and seal the free edge for longer wear.
- Practice on one nail first to learn timing and technique.
- Store resin upright and keep caps sealed to prevent thickening or clogging.
- If unsure, choose a clear kit for invisible repairs or a natural pink kit if you want a finished look.
Final Thoughts
Pick a kit with brush-on resin plus filler powder, simple tools, and air-dry curing for the best blend of ease and durability. Prepare your nail, apply thin layers, and seal the edge for a repair that lasts. When shopping, verify contents and reviews so you get a usable kit right away.